Category: Workshop and Equipment

  • Harness Handiwork

    Remember the promise we made at the end of the Heavenly Harnesses post?

    Next time we craft up a CRT harness, we’ll snap a few photos along the way. It’s a surprisingly deep topic!

    The opportunity came in April, when [Nick] commissioned an Oscilloclock Exo as a birthday gift for his father. What a thoughtful son; what a lucky dad!

    So – time to get the camera out and take those promised shots!

    The Harvest

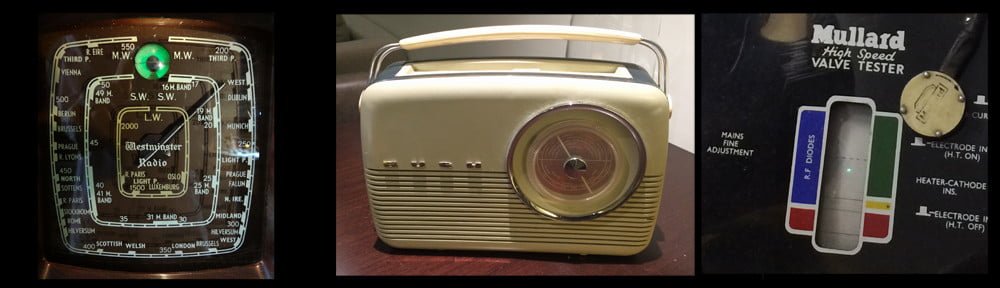
    Spring. Such a lovely time of year! Birds sing, bees buzz, and the bottomless bellies of big auction houses swell as people go about their spring cleaning, throwing out their clutter of yesteryear.

    Spring is harvest time. Vintage valve test equipment bounty for salvaging, scavenging, and scraping. And we hate to see a scrapping…

    … which is how a key part for [Nick’s] dad’s Exo’s CRT harness was obtained!

    That’s right. Every Oscilloclock Exo harness incorporates an original brown bakelite CRT socket, specially harvested from rescued equipment.

    After a CRT socket is harvested, all existing wires are desoldered, and the socket is cleaned thoroughly to remove all traces of residue. We even polish the bakelite, to bring out a beautiful grainy texture and lustre!

    What Wire?

    Voltage, voltage, and more voltage. The more the better, for a bright and sharp image – to the limit of the CRT’s specifications, of course!

    [Nick’s] dad’s Exo’s CRT would be driven by a potential difference of 2,000 volts. Given time, the insulation in standard hookup wire would be punctured through at this voltage, resulting in arcing or even worse: fire or electric shock.

    We don’t take chances! Oscilloclock CRT harnesses are made from silicone wire, rated at 3,000 volts and 150°C. Remember we talked about longevity? We weren’t joking – this wire weathers whatever, forever!

    Stripped & Secured

    Measuring and cutting is great fun! We all learned this in pre-school. But the essential skill of stripping wire comes much later in one’s life.

    It’s a delicate operation. Strip too much, and stray strands could short-circuit. Strip too little, and the solder joint may not be secure.

    In the Oscilloclock lab, almost everything is done by hand. But we pride ourselves on using the correct equipment, where it matters!

    After stripping comes soldering. This skill can literally be studied and improved upon for years, given the varieties of solder, flux, irons, and application techniques out there. At Oscilloclock, your lead engineer (and author…) has been soldering since the age of six, taught by Grandpa…

    Lab-quality equipment also plays a key role in reducing dreaded ‘dry joints’.

    After soldering, we slip on heatshrink tubing – this protects the naked terminals from dust. It also minimizes the potential for arcing across the air gap, especially in a high-humidity environment.

    The 3 E’s: experience, expertise, and expense. All to keep [Nick’s] dad safe from the dangers of a loose wire floating around at 2,000 volts!

    Shall we Shield?

    Yes! In [Nick’s] dad’s Exo design, there are a few wires that carry AC signals. Even worse, they carry high-frequency pulses.

    Remember the days of analog television and radio, when you brought a modern electronic device such as a computer or a phone close to the antenna? You saw (or heard) electromagnetic interference (EMI). Snow, buzz, hiss – this was all because the offending device was transmitting a signal!

    We won’t go into theory here, but yes – we do want to shield these wires.

    Finally we’re ready to apply the external sheath. This is made from a braided material to provide strength yet flexibility. And it looks great!

    We also slip on a specially designed rear cap (backplate), which has been custom-machined from black acrylic. This keeps dust, prying fingers, noses, or snouts out of the terminals. Nylon spacers safely insulate the screws (stainless steel, of course!) from the terminals.

    French Connection

    What image does “France” evoke for you: Romance? Fashion? Food?

    For us, it’s connectors! With its leading presence in the aerospace, space, and military industries, French engineers have created connection technologies that rival all others in handling severe environments.

    And we need a good connector for the other end of [Nick’s] dad’s harness. One that handles high voltages. One that’s fashionable. Romantic. Delicious, even! And France1 delivers it all:

    1. The company in question has since been acquired by a U.S. corporation. But we still classify the system as “French” due to its origins. And because it sounds good! ↩︎

    Critical Crimping

    Oscilloclock owners choose their preferred level of decadance. This even applies to the pins used in the connection system!

    But whether they select the extravagantly gold-plated, or just the basic tin, we need to affix the wires to the pins in the most reliable possibly way. We need to crimp!

    Crimping is the process of squeezing the metal tabs at the rear end of the pin around the strands of the wire, making an incredibly strong and low-resistance connection. The science behind this is amazing, and is worth its own article! For now, take our word for it – never solder when you can crimp.

    And as usual, we don’t scrimp on the crimp. [Nick’s] dad deserves the best:

    Finishing touches

    At last! The harness is looking like a harness.

    At the final stage, we insert the pins into the plug, apply a specially grippy heatshrink onto the Oscilloclock end of the cable, and insert a small strip of silicone rubber prior to tightening the cable stay.

    And voila!


    Like what you see?

    We love to harvest, harness, and handcraft. If you have exotic cabling requirements for your dream Oscilloclock, or indeed any custom cathode-ray tube connection system, it would be a delight to discuss! Contact us.

  • Well, I think that’s what’s going on….

    In a desperate attempt to save his blog from becoming the all too familiar not-updated-in-5-years dead blog, the senior technician has resorted to seeking help from one of his sons, previously referred to as the 1st junior technician. Although my knowledge on CRTs and electronics is close to none compared to that of the senior technician, I will give you some updates on the recent activities of the main man himself, who I am sure all of you are eagerly awaiting the return of.

    Amid the COVID-19 crisis, the senior technician has been lucky enough to be able to work at home. You would think that without his everyday commute of two hours, he would be more relaxed and able to spend more time with his family members. However, he is instead spending excessive time in front of the computer. At first, I speculated that he was having a rough time with his work. Or was he? Under closer examination, I realized that the additional time spent on the PC was actually something related to Oscilloclock. Something about a brand new design: “once-in-a-decade refresh,” and some such. Not really sure how significant this is to you all, but judging from the look on his face when he emerges from his room for dinner, it must be something BIG!

    Another clue that the Oscilloclock Lab is heavily active is the vast array of international deliveries to our home in the past half year. Shipments from countries that you’ve never heard of, in all shapes and sizes, arriving so frequently that I can’t help feeling for the poor postman who has to carry these heavy objects up to our door. I must tell you, there is nothing worse than hearing the bell ring and rushing down to the door anticipating your own Amazon delivery of a new pair of shoes, and instead seeing a massive box from Montenegro containing who-knows-what-type-of-CRT.

    The master craftsman’s work could very well be hindered by the noise from his two highly energised teenagers, [Oscillokid] and [Oscilloboy]. So how does he maintain concentration? The secret is a well-positioned cave. His workshop is intentionally situated at the very edge of the house. He simply closes the lone door to the shop, to avoid hearing a dinner-call or a request for more screen time from his Oscillosons. Until, of course, the commander-in-chief of the household raises her voice!

    So there it is, a brief update on what’s going on and how the senior technician’s doing. Rest assured that he is working very hard on his projects, and has not in the least swayed from his passion; indeed, he is more immersed than ever. He will no doubt inform all of you anxious readers of his magnificent projects once they are ready for exposure. Until then, thanks for reading, and stay safe!

  • Some readers may be curious just where these crazy Oscilloclock devices are actually made. While the question of WHO makes them shall remain a mystery, let’s definitely take a close look through the mad scientist’s laboratory!

    This panoramic view of the depths of the shop makes the place look huge, but in fact it is a tiny 8.2 square metres (88 square feet)!

    The entire workshop “sits” on the floor and is self-supporting – almost nothing is screwed in to the walls.

    Perhaps the kind reader might think this is the production of a master woodworker. In fact, nothing could be further from the truth! This was the very first piece of furniture I have ever built – and as you can see, it was quite a project…

    Design

    First and foremost, I used SketchUp to create an accurate scale model of the workshop. I modelled every piece of equipment I wished to eventually mount, and tested hundreds of layouts until coming to a final design. What an effort!

    Here I’ve loaded it into an STL viewer so you can play with it:

    Woodwork

    Most of the workshop is made from pine. All pieces of wood were cut from slabs using a cheap and nasty hand-held circular saw, as I did not have easy access to a table saw at the time. This was painstaking!

    The workbench surfaces are solid maple for hardness and longevity. Linseed oil was used as a finish, to keep things natural. Unfortunately, I have been rather lazy and have neglected to apply further coats since making the workshop!

    Maple, Pine, and lots of linseed oil!

    Drawers under the benches were crafted carefully to allow resident Oscilloclock artists to sit with plenty of leg room, and drawer slides were chosen with appropriate length such that the drawers open out far enough to access fully.

    Cabinets were fitted with adjustable internal shelving, and lovely hinges that allow access to the full width of the shelf even when the door is only open 90 degrees.

    Shelves were fitted above windows on one side of the room, mostly to store my extensive collection of 1940’s to 80’s Australian electronics magazines (Radio and Hobbies, Radio Television & Hobbies, and Electronics Australia). These shelves are the only pieces in the workshop that are actually screwed into the walls.

    For the reference bookshelf, I cheated and used a standard flexible solution from the local hardware store. It looks reasonable enough…

    Electrical

    The shop has its own electric meter, a second-hand one rescued from the junk pile. This one is designed for a much higher current than the humble Oscilloclock lab usually consumes, but it spins fast enough if I turn on enough equipment!

    The shop is equipped with no fewer than five different power supply lines, all at the resident frequency of 50Hz:

    • 100V – This may give away the lab’s country of residence…
    • 100V isolated – For testing “hot chassis” devices
    • 117V – Supplied by a massive, nasty 1500VA Variac
    • 200V – Straight from the local power company
    • 240V – Supplied by a massive hand-wound toroidal transformer

    Earthed 100V, 117V, and 240V outlets are literally peppered around the workshop, mostly tucked away behind the shelves. Datacentre grade outlet boxes were employed for ultimate safety. The best part? All equipment is plugged in and ready to use at any instant in time!

    Of course I also have a variable voltage, variable frequency AC power supply, which I use regularly when spinning up voltage into vintage gear, or when I need to evaluate power circuit performance at anywhere between 40 and 400Hz.

    No shop should be without its own set of circuit breakers! Here we see two of the several dedicated switches. These employ earth leakage detection, of course.

    Equipment

    A quick flick through the Oscilloclock blog reveals beyond any doubt that I have an extreme passion for vintage electronics. Nowhere is this more visually expressed than in this homey workshop. Every piece of equipment functions, and every piece is actually used at least once a year!

    But I shall leave the equipment show-and-tell for another post!


    But WHY?

    Well, for the fun of course! But in fact, this workshop was built exclusively for the design and construction of exquisite hand-crafted scope clocks. So don’t delay in checking out the fruits of the lab – visit the Gallery right now!

  • Robbie’s Place

    What do you do on a mundane business trip to London?

    Why, shopping, of course! But if you were the humble proprietor of Oscilloclock.com, you would do much more than that… You would seek to expand your vintage electronic empire!

    And so it was that I found myself hunting old electronic devices on Portobello Road one fine Saturday morning. Unfortunately, the game there was far and few between; only two relatively mediocre valve radios, in even more mediocre shape, at far more than mediocre prices…

    Fortunately, my colleague was going to save the day. “Pop out to Cambridge for a visit – I’ve seen a few antique shops here,” said he. And after the hour train journey and a wee but of walking, we stumbled onto a veritable gold mine – Robbie’s.

    (more…)