British Beauties

New stash!

These beautiful vintage British* CRTs have travelled the world over the last half century. And like homing pigeons, they have found their way at last to the Oscilloclock Lab!

From left: SE5F/P31, DHM9-11, E10-12GP, SE4DP31, SE5F/P7. Brands: Brimar, GEC, Valvo

Here, each piece of glorious glassware will receive the attention they have craved for years. They will be cleaned, rejuvenated, and start their latter-day lives performing retro electronic miracles for loving new owners from all over the world.
* In fact, one of these CRTs was not made by a British manufacturer. Can you spot which?

From Unloved to Loved

This SE4DP31 is brand new, complete with protective paper sticker that was attached at the factory to protect the front glass. It’s never been loved. Such a waste, and we will certainly rectify that, as we have done previously for similar CRTs:

Two is better than One

These bad boys are dual-beam CRTs. They have two electron guns and two sets of deflection plates, meaning they can display two completely independent figures at the same time.

We used one of these in the custom Aftershock Clock, to overlay standard clock faces against a map hewn entirely from Lissajous figures. The intensity (brightness) and positioning of each beam can be independently adjusted to get the overlay effect just right!

But importantly – the innards look so cool!

Feeling Blue?

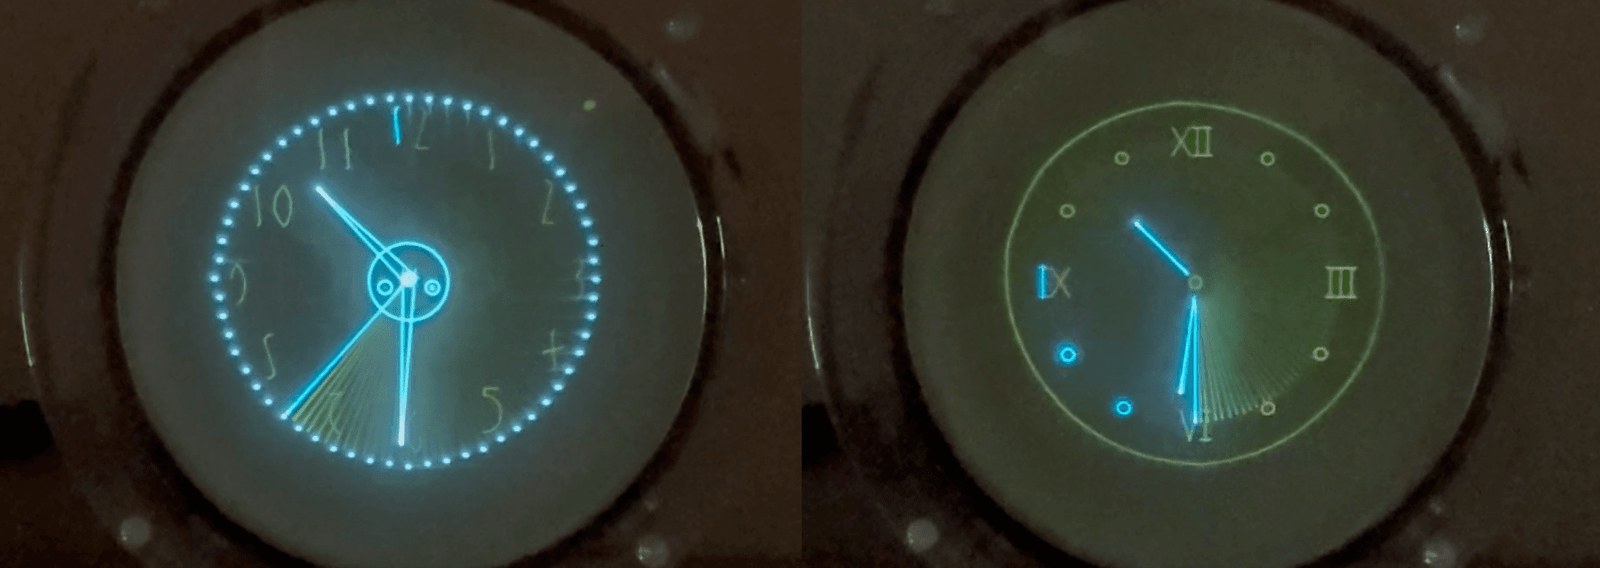
We’ve talked before about rare blue phosphor finds. The newly landed Brimar SE5F/P7 will one day boast both presence and persistence:

With thanks…

We dedicate this post and the promise of seeing these CRTs reincarnated to [Atif]. Many thanks for helping these pigeons find their roost!


Are you in a state of cathode-ray rapture? Check out other CRT related posts, and see the Gallery to see examples of vintage glassware objects given new leases on life!

Zork on an OscilloTerm!

Today’s story began with a mail from [Eric], who’d read up on the Oscilloclock 3-inch VGA Assembly and wondered if it could be used to create an old-school serial terminal display on a vintage oscilloscope CRT.

Yes it could! In fact, the Oscilloclock Lab did one better. Instead of just a VGA display controlled by an external device, we developed native terminal firmware that accepts DEC VT52 compatible commands over a serial port, and renders all text and graphics using beautiful, curvy Lissajous figures.

The stuff of dreams. The OscilloTerm Exo B7S4.

Demonstrating basic terminal features, connecting to a PC via serial cable
Oh, did I mention? It’s a clock as well!

Zork, anyone?

Ultimately, [Eric] just wanted to play Zork. And together we made it happen.

The CRT. The Case.

[Eric] wanted a sleek ‘skeleton’ look. His choice of a gorgeous B7S4 CRT, mounted in custom-machined cast acrylic supports, exposes all glassware and allows for a titillating rear viewing experience.

CRT rings and supports – originally introduced for the Oscilloblock “Summer Dusk” edition

And with a high-transparency cast acrylic case housing the electronics, the OscilloTerm Exo can be enjoyed from every angle!

Astute readers may wonder about the 2.1 kilovolts of high voltage coursing through their innocent-looking device. Rest assured! All internal wiring is sealed off, and Oscilloclock CRT harnesses are hand-crafted with heavy insulation and precautions taken against dust, prying fingers, rats, and even salivating cats.

An O-ring blocks dust from entering the CRT/socket gap (picture from the Oscilloblock)

This case and CRT mounting variation is branded the Oscilloclock Exo, and has proven its wow-factor at several public exhibits to date. We certainly love it, and [Eric] did too!

The Terminal.

This post would never be complete without showing you what real serial terminals from the 1970’s looked like, and explaining what they actually did! Here goes…

Terminals such as the above were physical input/output console devices, back when computers were the size of massive refrigerators, and the operator would sit remotely – at a desk in a separate area, or even a different room.

Gregory Lloyd, CC BY 2.0, via Wikimedia Commons

The terminal and the remote computer were connected via a cable, and would communicate each other by sending data back and forth across the cable; mainly terminal commands and ascii encoded text. Most commonly, a serial communication protocol was used to get the data safely from one end to the other – and hence the devices were known as serial terminals or even serial consoles.

Amusingly, they were also called dumb terminals, because they had no computing power of their own; they were only extensions of the computer to which they were connected.

The OscilloTerm Terminal.

[Eric] wanted a special Oscilloclock that he could also operate as a terminal, connecting it to a remote computer via cable. The remote computer would control the display, using the same serial protocol and commands as an ancient dumb terminal.

But an Oscilloclock is anything but dumb. [Eric] wanted to keep all the standard exciting screens and features of his Oscilloclock active, and only display the special Terminal screen when the remote computer started to send commands. Then, when the commands stopped, the Oscilloclock should go back to the screen it was on!

His wish was our command! Here’s a demo of smart screen switching in the final product:

Some technical Comments

Naturally, the terminal emulator firmware was written entirely in assembly language.

PIC18F2680 – the Oscilloclock workhorse.

We use assembly mainly because the minimalist PIC microcontroller used in the current Control Board revision has only 64K ROM, and an unbelievable 3328 bytes (yes, BYTES!) of RAM. To squeeze all the lovely Oscilloclock features in, while driving Circle Graphics real-time processing, the code and memory space has to be clean, tight, and heavily optimized at the machine code level.

Assembly. It’s the ONLY way to squeeze it all in!

For even more technical details, such as the list of VT52 (and VT100) commands supported by the OscilloTerm, and the various configuration parameters that can be tweaked to make the terminal emulator more ‘friendly’ when connecting to a specific device, check out the Support page. Worth a visit!

Why Zork? And HOW?

Zork is an interactive adventure game. But it’s old. And it’s text-based, because it was run on computers long before fancy graphics capabilities were widely available. The player explores mysterious locations, solves puzzles, and collects treasures while avoiding various hazards and creatures. All by reading text and typing commands and responses!

[Eric] was able to play Zork by loading the game’s Z-code into a Z-machine interpreter known as Frotz, on a PC connected to the OscilloTerm. But there was trickery involved!

  1. He had to recompile a version of dfrotz (the dumb terminal version of frotz) to remove the status bar and audio from the game.
  2. He needed to wrap the dfrotz output with a custom Python script to support the OscilloTerm’s 16×8 screen and simulate the required baud rate.

But now that’s done, he can play any Infocom game that runs in dfrotz on his OscilloTerm!

What’s next?

Readers would probably agree that adding a generative AI feature would be incredibly cool. For example, the War Games feature is great, but the text on the screens is all pre-programmed. What if you could interact more naturally with your Oscilloclock?

Another one for the list!


Are you a serial serial terminal collector? Do you want to play Zork on the oddest device imaginable? Or, you fancy a clock in the Oscilloclock Exo range? Contact us and let us know!

A Performance Upgrade

Aside

The Oscilloclock Lab isn’t bustling again just yet, but we’re getting things prepared!

Return visitors to Oscilloclock.com will notice a big change from last week – the site is now blindingly fast!

We’ve upgraded hosting infrastructure and achieved massive improvements in response and load times.

Wow – 10x performance improvements!

So: Browse. Search. Learn. Enjoy our cathode-ray tube escapades. And subscribe on the main page to stay tuned!

Building the Astro Clock

In the last post, we took a look at a funky new sidereal clock from the Oscilloclock Lab. Now let’s take a look at what fanciness went into it!

The Hardware

[Alan], our astronomer protagonist, wanted to install all the electronics inside his Tektronix 620 X-Y Monitor. He didn’t need a nice fancy case.

Demonstration of a Lissajous circle
No pixels here! Circle Graphics

No problem! We supplied the Oscilloclock Bare – our stand-alone controller board that generates images and text rendered in smooth and silky Lissajous figures.

The board ships on a cast acrylic mount to make it easy to test externally, prior to installation into the host piece of equipment.

Next, we added the Oscilloclock Wave. This is a Wi-Fi adapter that allows an Oscilloclock to pull (Solar) time from NTP servers over the internet, keeping accurate time indefinitely.

Bare-bones Wave Core module

For [Alan], we left the cabling and aesthetics options open, and shipped the basic Wave Core module instead of the stand-alone type pictured above.

Finally, we included a decent quality power pack, to allow running the assembly prior to installation.

This would eventually be eliminated by powering the unit from the Tek 620’s internal supply itself.

The software – Sidereal time enhancements

To transform the Oscilloclock Bare into the astronomically great Astro Clock that it is today, we needed sidereal time.

Querying the sidereal API. Easy as pie!

Easy! The US Naval Observatory Astronomical Applications Department provides a publicly available API for querying sidereal time, given a location.

The Oscilloclock Wave already had features to pull earthquake data from a similar API and push it to the Oscilloclock for display. Extending this for another API wasn’t astronomically difficult.

The Wave sports a bunch of advanced settings for particularly tweak-loving oscillofans out there. We just needed to add a few more! These are to enable querying and sending sidereal time to the Oscilloclock, and to set the location.

Setting up for sidereal time

But why not just calculate sidereal time?

Some readers may have guessed that formulae and code libraries for calculating sidereal time are readily available. Why didn’t we just implement the calculation in code, and avoid depending on an external API?

Our minimalist PIC 18F2680 even had a terrible bug at one point…

Well, I’ve mentioned before that the current revision Oscilloclock Control Board uses a minimal-specification microcontroller with very limited capabilities, and is heavily optimized by coding in assembly language.

Sadly, this chip was already jam-packed to the hilt, and there simply wasn’t any more space left for the code and run-time memory needed to calculate sidereal time internally.

And writing the necessary floating-point calculations in assembly would be no mean feat!

Why Assembly Code?

Because We Can.

But, it sure ain’t easy…

So NO – we couldn’t easily calculate sidereal time, and it was API Option full steam ahead!

Astro Screens!

Even with its minimalist microcontroller chip, we’ve managed to squeeze some amazing stuff into the Oscilloclock Control Board firmware.

For more of the weird and wacky, see Screens & Things!

For this build, we needed yet more screens.

First, we used our trusty Figure Creator software to render a rudimentary telescope into Circle Graphics sprite code.

Astro Clock splash screen

We then crafted a simple Astro Clock splash screen, by adding some random circles for stars and laying out basic text around the telescope.

Finally, we added some basic digital and analog clock screens, using the same telescope figure as a centrepiece. This was mostly straightforward, but the existing clock hand drawing code did need some tweaking, to reference either solar time or sidereal time depending on the active screen.

Done!

Invoiced. Paid. Shipped. Received. Treasured forever. Right?

Wrong!

Sidereal really sidelined…

A year after [Alan] received his lovely Astro Clock, the unhappenable happened. The Astronomical Applications API was taken down!

“undergoing modernization”… a harbinger of API death! Jan 2020 snap courtesy archive.org

The site was taken offline for a planned six months, for “modernization”. [Alan]’s sidereal clock was relegated to a normal solar Oscilloclock, albeit temporarily.

But as lovers of electron beams striking phosphor, we always look at the bright side! Six months is still relatively short in astronomical terms! We resignedly marked “X” on the calendar, and bided our time.

But then… the unfathomable fathomed. The COVID-19 pandemic struck. The USNO site modernisation was completely halted – very likely deprioritised in the midst of indiscriminate illness, clinical chaos, and staff shortages.

Halted… 2 years later, still no luck… Mar 2022 snap courtesy archive.org

We waited, and waited, and waited. There were no fingernails remaining to chew when, after two and a half years, a revised API was finally made available at the end of 2022. Hooray! Thank the stars!

API resurrected

Fresh API documentation in hand, we set about modifying the Wave to use the fresh fruits of the USNO modernisation machine.

Fortunately, there were only minor changes to the API – a few more mandatory data fields, a change in date format and such. These required a relatively small amount of rework in the Wave’s firmware.

And … we were back in the amateur astronomy business.

Almost like a big Christmas present from Santa!

Was this [Alan]’s Christmas present? – Santa in your Clock

Do we regret taking the API approach?

It’s a good question. API death could happen at any time – possibly rendering the Astro Clock lifeless, listless, or lethargic yet again.

But, no. The decision not to calculate internally was valid, based on the known constraints. And we did our veritable utmost to revive poor [Alan]’s Astro Clock as soon as possible.

By the way, we at the Oscilloclock Lab certainly can’t complain about USNO’s API shutdown. We, too, have been heavily impacted by pandemic and other worldly events. As of this posting, our formal activities, too, remain on pause…

… for now!


Curious about other Oscilloclocks that use APIs? Check out the AfterShock Clock, which taps into an earthquake API to display earthquakes in (almost) real-time on a lissajous-rendered map!

Astro Clock

A few years ago, we introduced Metropolis Time, a time system based on the 20-hour, two-shift days featured in Fritz Lang’s iconic movie Metropolis.

Since then, we’ve received a few requests to craft clocks that display some other calendar and time systems – from the ancient and archaic, to the religious, to the scientific.

That’s Astronomical!

Today’s exciting story began with a request from [Alan], a prominent amateur astronomer. He happened to have a lovely Tektronix 620 X-Y Monitor lying around, and wanted to turn it into a clock.

Well, that would be easy – the Oscilloclock Bare is a bare-bones controller assembly that can be used to drive an oscilloscope or XY monitor that meets certain requirements (for the techies: a DC coupled Z-axis amplifier). And the Tek 620 is perfect – wonderfully performant, and perfectly compatible. Job done! Right?

Oscilloclock Bare + Tek 620 + scientific passion = Astro Clock!

No way! [Alan] didn’t want just any old clock. The custom splash screen above was pretty cool, but could his clock display something called “sidereal time“?

Yes! Anything is possible, and here’s what we ended up delivering: several custom clock faces showing sidereal time (in both analog and digital formats), in addition to all the standard screens that are based on solar time.

The shipped Astro Clock assembly!

But what is sidereal time?

A Solar day

Well, most normal human beings and their clocks like to measure a 24 hour day by using the Sun as a reference point. One solar day is the time it takes for the Earth to spin on its axis enough and see the Sun at the same height in the sky as the previous day.

For example, let’s say it’s 1 May 2023. It’s lovely weather out, and you happen to notice that the Sun reached its highest point in the sky at 12:30 pm. The next day, 2 May, you would find the Sun at its highest point at — you guessed it! — 12:30 pm. And if you ignore man-made tweaks such as daylight savings, you find the Sun is always at its highest point at 12:30 pm*, year-round, looking from the same location.

*This is not quite true – because every day is slightly shorter or longer. But it averages out over the year.

A sidereal day

Sidereal time, on the other hand, uses the distant stars as a reference point to measure 24 hours. One sidereal day is the time it takes for the Earth to spin on its axis enough to see the same distant star at the same height in the sky as the previous day.

Because the Sun is so close, and a distant star is so (relatively) far, there is a difference in the length of a sidereal day compared to a solar day. A sidereal day turns out to be approximately 23 hours, 56 minutes, and 4.0905 seconds.

Confused? I don’t blame you. This video should help:

History and Sidereal clocks

According to this brilliant post, the concept and utility of sidereal time has been around a very long time. The length of a sidereal day was even calculated to a surprisingly high level of accuracy some 1,500 years ago!

Here are two surviving sidereal clocks that were made “recently” – just a few centuries ago.

But who on Earth would use sidereal time?

Astronomers would.

Most people don’t look at the boring old Sun all the time. We look out to the stars and galaxies far, far beyond our solar system. If an astronomer wants to track the position of Betelgeuse day after day, she can record the sidereal time that she saw it, and know that it’ll be at the same ascension at the same sidereal time the following day. Brilliant!

Mariners and Astronauts would.

They can fix their location even when the Sun is not visible, by observing the position of the stars and calculating their position back from the current sidereal time. Life-saving!

Oscilloclock Labs would.

Because we can.


In the next post, we’ll take a look at the build. What hardware went into this Astro Clock? How on earth does it tick? Can you figure it out?

Update on our Hiatus

Aside

[Update April 2023]

Hi! The Oscilloclock Lab is still on a pandemic-induced hiatus, for all the good reasons explained in last year’s announcement. For now the Contact form remains closed and we can only take enquiries from existing clients.

But good news – the constraints are being resolved, one by one, and Oscillolife will resume – eventually. We have oodles of backlogged ideas, heaps of ambition, and of course a nice stock of gorgeous CRTs and vintage scopes to make use of.

So stay tuned, and read on!

ChatGPT reviews Oscilloclocks!

Recently [Nels] wrote in saying he’d been having a nice chat with ChatGPT, and in the course of conversation, he asked this trendy AI tool to write a “review” of the clocks we make here in the Oscilloclock Lab.

Here is the result – verbatim!

[Nels] Write a review of Oscilloclock tube clocks.

[ChatGPT] Oscilloclock tube clocks are a unique and visually stunning way to keep time. These clocks use vintage CRT (cathode ray tube) displays, similar to those used in old televisions and oscilloscopes, to display the time and other information in a mesmerizing way.

One of the standout features of Oscilloclock tube clocks is their attention to detail. These clocks are handmade by a single individual, and every aspect of their construction is carefully considered. From the selection of the CRT displays to the circuitry that drives them, every component is chosen for its quality and durability.

The result of this attention to detail is a clock that not only looks amazing but is also highly reliable and accurate. The timekeeping is controlled by an ultra-precise quartz crystal, ensuring that the clock is always on time. Additionally, the clock can be set to display a variety of other information, such as the date or temperature, making it a versatile addition to any room.

One of the things that sets Oscilloclock tube clocks apart from other timepieces is their ability to be customized. The clock face can be designed to display any number of patterns or shapes, from geometric shapes to more abstract designs. This customization allows the clock to be tailored to the individual’s taste and can even be used to display personalized messages or graphics.

While Oscilloclock tube clocks are undoubtedly a premium product, they are worth every penny for those who appreciate the unique combination of vintage technology and modern craftsmanship. The quality and attention to detail of these clocks are unmatched, and they are sure to be a conversation starter in any room. If you are looking for a truly one-of-a-kind timepiece, the Oscilloclock tube clock is definitely worth considering.

Our thoughts?

While there are three inaccuracies (one incorrect fact and two debatable points), the writeup is a lovely read and initially made your humble Lab technician feel warm inside.

Until, upon objective reflection, I recognised some of the style, phrases and wording!

Well, of course it should look familiar! ChatGPT predicts what the human expects as a response, and then cleverly arranges and regurgitates data that it has absorbed as part of its training. Apparently, it has devoured much of the Internet up until early 2022. This would include 59 blog posts and 19 pages published on Oscilloclock.com up until that date – and a few other references such as three lovely write-ups on Hackaday.

[Nels] apparently did not continue the conversation, but if he had, he could have pointed out the three inaccuracies (Quiz – have you spotted them yet? Check your answers below), and ChatGPT would have learned something.

Even with a rough understanding of how this tool works, it’s amazing to see the outcome.


Crazy idea – what if your Oscilloclock could connect to an AI service and deliver cool new images, funny text, or interesting conversations? Just watch out for mistakes!

Robots wrote this review! Oil paintings generated by ChatGPT sibling DALL·E 2

Quiz answers:

  1. Incorrect: “… handmade by a single individual.”
    • In fact, several craftspeople have been involved to date in the design, assembly, and software authoring required to build Oscilloclocks. (Even excluding the PCB and case manufacturing processes.)
  2. Debatable: “… timekeeping is controlled by an ultra-precise quartz crystal
    • It’s true that the current revision Oscilloclock Control Board does have an on-board quartz crystal, and this does keep reasonably accurate time if needed…
    • However the preferred mode of operation is to synchronise time against GPS (using a GPS receiver) or an NTP server (with onboard Wi-Fi or the Oscilloclock Wave).
  3. Debatable: “… the clock can be set to display … temperature
    • The current revision Control Board and firmware do not support temperature sensing.
    • But it’s true that it’s on the ever-growing list of things to do! Did ChatGPT predict this?

Garmin “puck” USB adapter – Finale

In the first post in the series, we looked at the Garmin 18x LVC “puck”. We talked about a particularly insidious issue that affected [Andrew] – both of his GPS units. And we saw that Oscilloclock owners really need to be able to update the firmware in these units.

In Part 2, we went through the design of an Oscilloclock Garmin 18x USB Adapter, that would allow the GPS to connect to a PC where the Garmin software runs to upgrade the firmware.

Now we conclude the series, with a treatise on the construction of the Adapter. Enjoy!

The final design

Here’s the design we arrived at in the last post. Let’s go through the steps to build it!

Fish out Fake Chips

TTL serial to USB adapter – watch out for fakes!

The key component required is a decent TTL serial to USB adapter with programmable inversion on the signal lines. But here we have to careful: many low-cost adapters out there are built around fake FTDI chips!

As mentioned before, we at Oscilloclock are pacifists. But if we were to wage war against anything, it would be fake components. They are unsafe, unreliable, unworkable, and entirely unethical. You get what you pay for, if you pay the right people. The people who design, manufacture, and support the real McCoy.

Besides ethics and reliability, there is also a practical reason we must avoid adapters based on fake FTDI chips – often the fake chips are not programmable. A true no-no. So watch out.

Program the inversion

FTDI provide a nifty utility called FT_Prog. Below shows the utility running on a PC with the adapter connected, and configuring to invert the transmit (TXD) and receive (RXD) signals.

Is it complicated? No – quite the inverse!

Dividing the input signal

We need to figure out the most elegant way to install the voltage divider – the two resistors we described earlier that reduce the impact of noise.

The cleanest way seemed to be to install the 1.2k shunt resistor directly across the receive and ground pins in the adapter itself, as below.

What about the 270 ohm series resistor on the RXD line? Well, installing this inside the adapter unit itself would require cutting tracks on the PCB. And that would compromise our effort, reliability, and aesthetics goals! So instead, we’ll insert this into the cable later on.

Cable Connector Conundrum

Recall that [Andrew] has two Garmin 18x units – one fitted with a small GPS connector and the other with a large connector. Wiring up two independent cables would have been natural. However, the TTL Serial to USB adapter came with only one cable pre-fitted with the necessary “DuPont” (a.k.a. Qi or 2550) connector.

DuPont, Qi, 2550 – they look low-cost but… Read this excellent writeup and weep

What’s the big deal? Surely we can just attach a Qi connector to another cable?

Ha! Connector tech is never that easy! It turns out that to make a perfect connection with Qi connectors, you need a special crimping tool. The Oscilloclock Lab does not have this tool. And we do NOT compromise on perfection! Given that this adapter is not the best reason to invest in an incredibly expensive tool, we decided to use the single pre-fitted cable and split out to two GPS connectors, with the larger one serving as the split point.

(In hindsight, we could have separately purchased another quality cable that was pre-fitted with the connector. Next time, folks!)

Wire up the cable

Our beloved ultra-quality Hirose connectors are a joy to look at, and a joy to use. But wiring the tiny smaller units up with high precision doesn’t exactly “spark joy”. Still, we persevere…

Now we need to install the 270 ohm series resistor. We simply cut the wire and splice it in.

A bit more heatshrink applied, and we’re done!

Closure at last

Using the 18x USB adapter, [Andrew] is at last able to upgrade his pucks and enjoy his clocks in their full glory with GPS-synchronized time and date once again!

Instructions for how to upgrade the software are posted on the Support – Garmin 18x page.


Did you enjoy this series? Stay tuned for more, as Oscillolife returns to nor….. Okay, not quite normal, but at least it returns!

Garmin “puck” USB adapter – Part 2

In the previous post, we looked at the Garmin 18x LVC “puck”. We talked about a particularly insidious issue that affected [Andrew] – both of his GPS units. And we saw that Oscilloclock owners really need to be able to update the firmware in these units.

We introduced the Oscilloclock Garmin 18x USB Adapter, that allows an Oscilloclock owner to connect their puck to a PC to enable the firmware upgrade.

In this post, we’ll take a look at the design of the Oscilloclock Garmin 18x USB Adapter. It wasn’t GPS satellite launcher (a.k.a. ‘rocket’) science, but it certainly wasn’t as straightforward as it might seem!

The Garmin 18x LVC electrical interface

Referencing the manual, the Garmin 18x series comes in 3 basic interface variations:

  • USB – USB 1.x interface, with a USB(-A) connector to plug into a PC
  • PC – RS-232 serial interface*, with a DB9 connector to plug into a PC, and a massive cigarette lighter adapter plug to obtain power
  • LVC – RS-232 serial interface*, with no connector – for wiring into a device

For our Oscilloclocks, we use the LVC variation and fit an attractive custom connector solution, avoiding the PC variation with its venerable, utilitarian, and aesthetically unpleasant DB-9 connector and cigarette lighter plug combo. (We may buck the trend one day and intentionally fit such sockets into that special retro clock build – who knows?!)

* Astute readers noticed the earlier asterisks. PC and LVC units are not quite true RS-232; their output voltage swings between 0V and +5V. Not so with devices having true RS-232 interfaces! A swing from -25V to +25V is legal and also lethal for any unsuspecting microcontroller. In the Oscilloclock design, we take advantage of Garmin’s voltage range cap to avoid having additional circuitry to adjust voltage levels.

Interfacing the 18x LVC to a PC

To upgrade the GPS firmware, the 18x LVC needs to connect nicely to a PC. But [Andrew] is an Oscilloclock Owner. He deserves more than just a good electrical connection. The interface also must be elegant and aesthetically pleasing, lightweight (for shipping), and easy to build. And – most of all – it has to be interesting enough to write a blog series about!

We can start with Figure 1 in the manual, which describes the most basic interface hook-up possible.

This interconnection option assumes two things: the PC has a DB-9 serial port, and there is a power source.

If we extend this option slightly, to take power from the PC’s USB port, we arrive at this:

Continue reading

Longevity, and the Garmin “puck”

A few months ago, [Andrew] – of Metropolis Clock fame – reached out for help. He had just pulled his lovely Oscilloclocks out of storage to put on display, when he observed odd behaviour in both units: the time was accurate, but the date was stuck – to some random date back in 2003!

What on earth was going on?

What’s going on was not “on Earth” after all! [Andrew]’s clocks synchronise time and date against satellites, using an external Garmin GPS unit. And this unit happened to have a serious flaw. In this series of three articles, we’ll look closer at this accessory, identify this issue, and see how we were able to resolve it. Enjoy!


Our longevity dream

We want your Oscilloclock up and running as long as you are – and even beyond! Our dream is to see these beloved devices inherited by loved ones, and even available on the second-hand market as antiques one day.

In an era of throw-away technology, we flaunt an unthinkable target: Decades of trouble-free* operation.

* Excluding the CRT itself – although we really try hard with that as well, as this post explains!

To maximise usable lifetime (and safety!), we construct Oscilloclock units from the finest materials and components available. As part of this, we also select manufacturers that guarantee their components and provide decent after-sales support.

And Garmin is one such manufacturer…

Welcome to the Garmin GPS ‘Puck’

All Oscilloclock models that synchronise time using an external GPS unit have so far been supplied with a Garmin 18x LVC GPS unit, colloquially known as a ‘puck‘. (Note: to extend the lifetime of the pucks, we do not recommend using them on the hockey court.)

Now, this is not the smallest external GPS unit on the market today. But it has been available from Garmin since 2007, and is even being manufactured today! It is one of the most sensitive, robust, and well-supported units out there.

(Of course, for every new Oscilloclock delivered we evaluate afresh based on the latest devices available.)

This puck has a special connector …

How many times have you relegated an expensive laptop, phone, or other random device to the trash just because the power socket or headphone jack failed? Some of the weakest components of any electrical device are its connectors – plugs and sockets.

To combat such failures, your puck is wired with an exceptionally high quality connector from Hirose. This connectivity solution is not only robust, it even feels good! There’s a lovely audible and tactile ‘click’ when you engage the plug, and it locks securely in place. And unlike cheap chrome-plated connectors, we’ve proven that these babies do NOT corrode, even after a decade.

-- We don't scrimp - we only crimp!
Continue reading