In the last post, we took a look at a funky new sidereal clock from the Oscilloclock Lab. Now let’s take a look at what fanciness went into it!
The Hardware
[Alan], our astronomer protagonist, wanted to install all the electronics inside his Tektronix 620 X-Y Monitor. He didn’t need a nice fancy case.

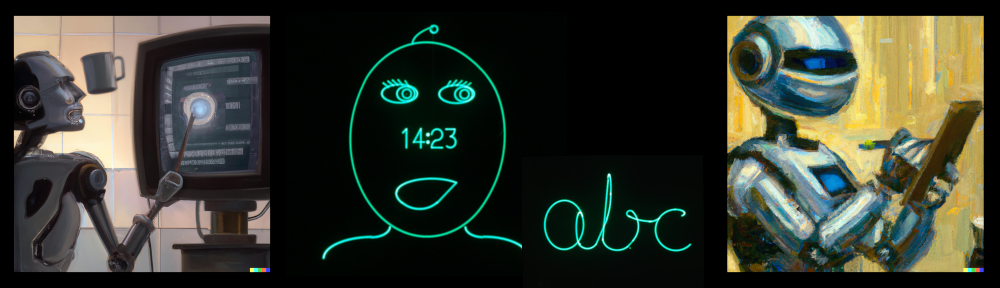
No problem! We supplied the Oscilloclock Bare – our stand-alone controller board that generates images and text rendered in smooth and silky Lissajous figures.
The board ships on a cast acrylic mount to make it easy to test externally, prior to installation into the host piece of equipment.


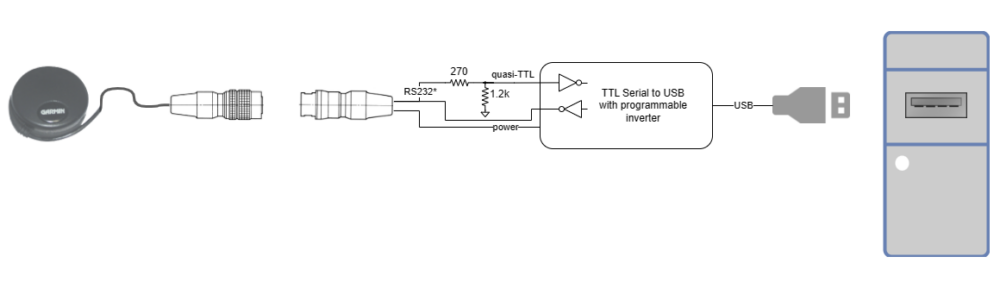
Next, we added the Oscilloclock Wave. This is a Wi-Fi adapter that allows an Oscilloclock to pull (Solar) time from NTP servers over the internet, keeping accurate time indefinitely.


For [Alan], we left the cabling and aesthetics options open, and shipped the basic Wave Core module instead of the stand-alone type pictured above.
Finally, we included a decent quality power pack, to allow running the assembly prior to installation.
This would eventually be eliminated by powering the unit from the Tek 620’s internal supply itself.
The software – Sidereal time enhancements
To transform the Oscilloclock Bare into the astronomically great Astro Clock that it is today, we needed sidereal time.

Easy! The US Naval Observatory Astronomical Applications Department provides a publicly available API for querying sidereal time, given a location.
The Oscilloclock Wave already had features to pull earthquake data from a similar API and push it to the Oscilloclock for display. Extending this for another API wasn’t astronomically difficult.
The Wave sports a bunch of advanced settings for particularly tweak-loving oscillofans out there. We just needed to add a few more! These are to enable querying and sending sidereal time to the Oscilloclock, and to set the location.

But why not just calculate sidereal time?
Some readers may have guessed that formulae and code libraries for calculating sidereal time are readily available. Why didn’t we just implement the calculation in code, and avoid depending on an external API?

Well, I’ve mentioned before that the current revision Oscilloclock Control Board uses a minimal-specification microcontroller with very limited capabilities, and is heavily optimized by coding in assembly language.
Sadly, this chip was already jam-packed to the hilt, and there simply wasn’t any more space left for the code and run-time memory needed to calculate sidereal time internally.
And writing the necessary floating-point calculations in assembly would be no mean feat!

Why Assembly Code?
Because We Can.
But, it sure ain’t easy…
So NO – we couldn’t easily calculate sidereal time, and it was API Option full steam ahead!
Astro Screens!
Even with its minimalist microcontroller chip, we’ve managed to squeeze some amazing stuff into the Oscilloclock Control Board firmware.

For this build, we needed yet more screens.
First, we used our trusty Figure Creator software to render a rudimentary telescope into Circle Graphics sprite code.


We then crafted a simple Astro Clock splash screen, by adding some random circles for stars and laying out basic text around the telescope.
Finally, we added some basic digital and analog clock screens, using the same telescope figure as a centrepiece. This was mostly straightforward, but the existing clock hand drawing code did need some tweaking, to reference either solar time or sidereal time depending on the active screen.


Done!
Invoiced. Paid. Shipped. Received. Treasured forever. Right?
Wrong!
Sidereal really sidelined…
A year after [Alan] received his lovely Astro Clock, the unhappenable happened. The Astronomical Applications API was taken down!

The site was taken offline for a planned six months, for “modernization”. [Alan]’s sidereal clock was relegated to a normal solar Oscilloclock, albeit temporarily.


But as lovers of electron beams striking phosphor, we always look at the bright side! Six months is still relatively short in astronomical terms! We resignedly marked “X” on the calendar, and bided our time.
But then… the unfathomable fathomed. The COVID-19 pandemic struck. The USNO site modernisation was completely halted – very likely deprioritised in the midst of indiscriminate illness, clinical chaos, and staff shortages.

We waited, and waited, and waited. There were no fingernails remaining to chew when, after two and a half years, a revised API was finally made available at the end of 2022. Hooray! Thank the stars!
API resurrected
Fresh API documentation in hand, we set about modifying the Wave to use the fresh fruits of the USNO modernisation machine.
Fortunately, there were only minor changes to the API – a few more mandatory data fields, a change in date format and such. These required a relatively small amount of rework in the Wave’s firmware.
And … we were back in the amateur astronomy business.
Almost like a big Christmas present from Santa!
Do we regret taking the API approach?
It’s a good question. API death could happen at any time – possibly rendering the Astro Clock lifeless, listless, or lethargic yet again.
But, no. The decision not to calculate internally was valid, based on the known constraints. And we did our veritable utmost to revive poor [Alan]’s Astro Clock as soon as possible.
By the way, we at the Oscilloclock Lab certainly can’t complain about USNO’s API shutdown. We, too, have been heavily impacted by pandemic and other worldly events. As of this posting, our formal activities, too, remain on pause…
… for now!
Curious about other Oscilloclocks that use APIs? Check out the AfterShock Clock, which taps into an earthquake API to display earthquakes in (almost) real-time on a lissajous-rendered map!